

norbury.brook
-
Posts
94 -
Joined
-
Last visited
norbury.brook's Achievements
")


-
https://connect.mazda.com/en/support/gracenote_update/
-
8. Press the 'Return' arrow BUTTON on the screen many times to go back to the top page of the Factory/Service Inspection screen. From there, scroll down and choose "End Diag Mode" to get back to the Normal Screen. WRITING TO POST TO THIS FORUM TOPIC....
-
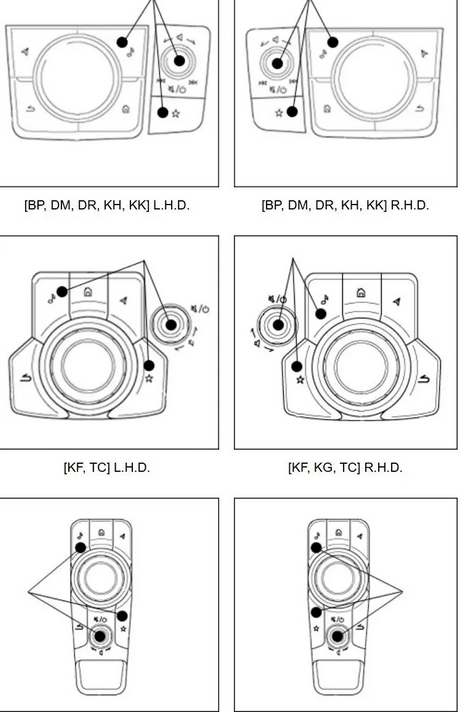
To Replace the firmware update in your Mazda correctly, you must first reveal the whole version numbers on the screen below. 1. Push the start button (with the radio turned on) to activate the ignition or ACC. 2. Keep pushing the volume mute button simultaneously. The "Diagnostic Test" screen will display when you simultaneously push the Music and Favourite buttons for three to five seconds. 3. Use the Commander Knob to scroll up or down the list on the screen, as shown by the orange highlighted items. 4. Press the Commander Knob once to bring up the screen, and then choose the orange "Service Information" option. 5. From the screen, choose "Connected Device Information" (orange). Next, find the orange "CMU" option and click on it. 7. The screen labelled "Device Version Information CMU" follows. View the ECU software number '7000C0A-NA11_10008' as an example. What we need to know is the whole string of numbers and letters beginning with 70xxCxx-xxxx_xxxxx. To exit the test, record your numbers and then click the return arrow. Capture a screenshot of your screen and send me a private message while we're talking.
-

-
Something akin to this, then...
-
Ok , many thanks👌
-
Thank you very much
-
-
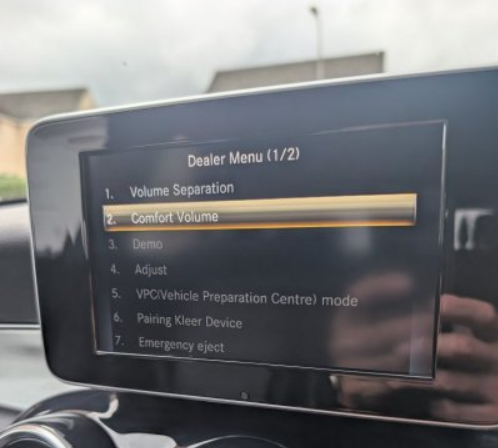
Greetings to everyone. Could someone elucidate the functions of the choices in the accompanying dealer menu, please?
-
I do so every four to five days.
-
The length of the dipstick is irrelevant; the black triangle at the top of the dipstick's plastic part encounters a limit above the gearbox sump, enabling the black measuring section to ascertain the fluid level from above. It is customary for a significant portion of the dipstick to protrude from the dipstick tube inside the engine compartment. The ATF level is assessed while the engine is running, in park, on a flat surface, after a 30-minute drive when heated.
-
In this case, I believe you cannot disable the traction control. However, I am elderly and may be mistaken, amusingly.
-
2007 BMW 123d fuel overflow pipes
norbury.brook replied to norbury.brook's topic in General Car Chat
Thank you, please inform me. -
2007 BMW 123d fuel overflow pipes
norbury.brook replied to norbury.brook's topic in General Car Chat
Strangely, realoem does not display the T-piece present in my vehicle, marking the single instance of inaccuracy I have encountered with realoem. The image above depicts the T-piece branching just after the yellowish pipe.